
eVMDS User Manual
CONTENTS
1. Introduction
The eVMDS Server is a cloud-hosted, web-based application designed to simplify video content management.
With eVMDS Server, you can:
- Upload and manage video media files.
- Create and organize playlists for specific calendar days.
- Schedule video playback based on a calendar view.
- Manage playback devices (Players) to deliver your content seamlessly.
2. Getting Started
2.1. System Requirements
To access the eVMDS Server, you need:
- A modern web browser (e.g., Google Chrome, Mozilla Firefox, Microsoft Edge, or Safari).
- A stable internet connection.
- A valid eVMDS Server account (contact your administrator or support team for access).
- For playback devices: PCs, Mini PCs, or Laptops with the eVMDS Player software installed.
2.2. Logging In
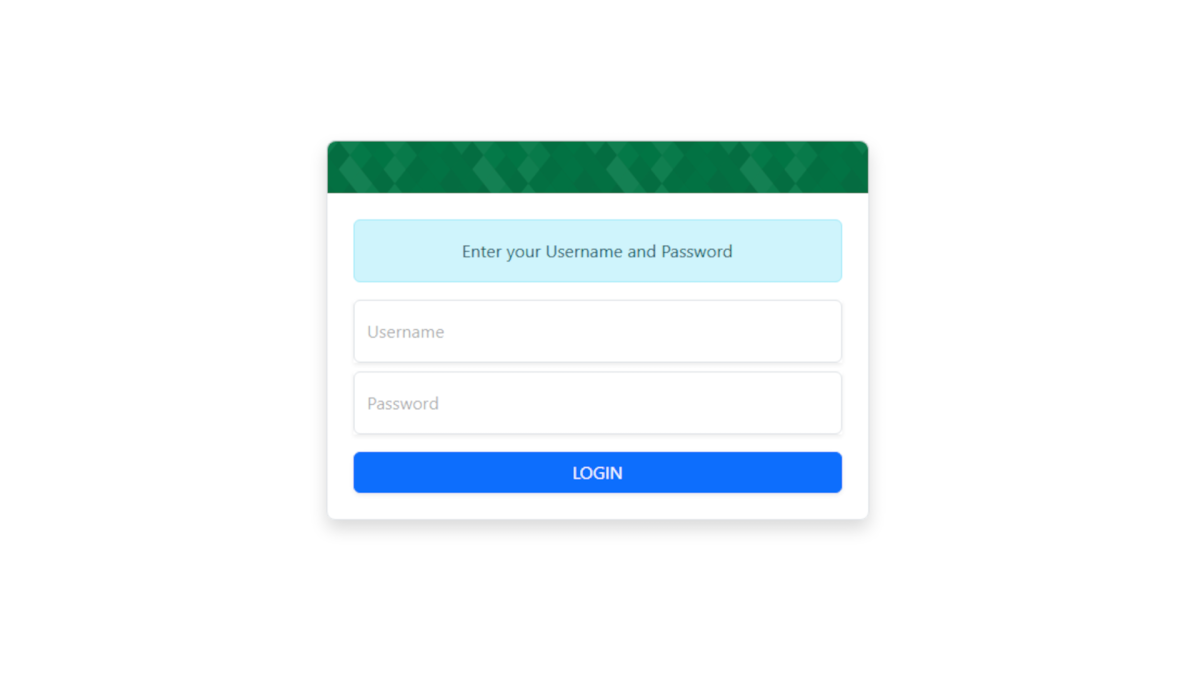
- Open your web browser and navigate to the eVMDS Server URL (provided by your administrator).
- Enter your username and password.
- Click Login to access the eVMDS Server dashboard.
3. Media Management
3.1. Uploading Video Files
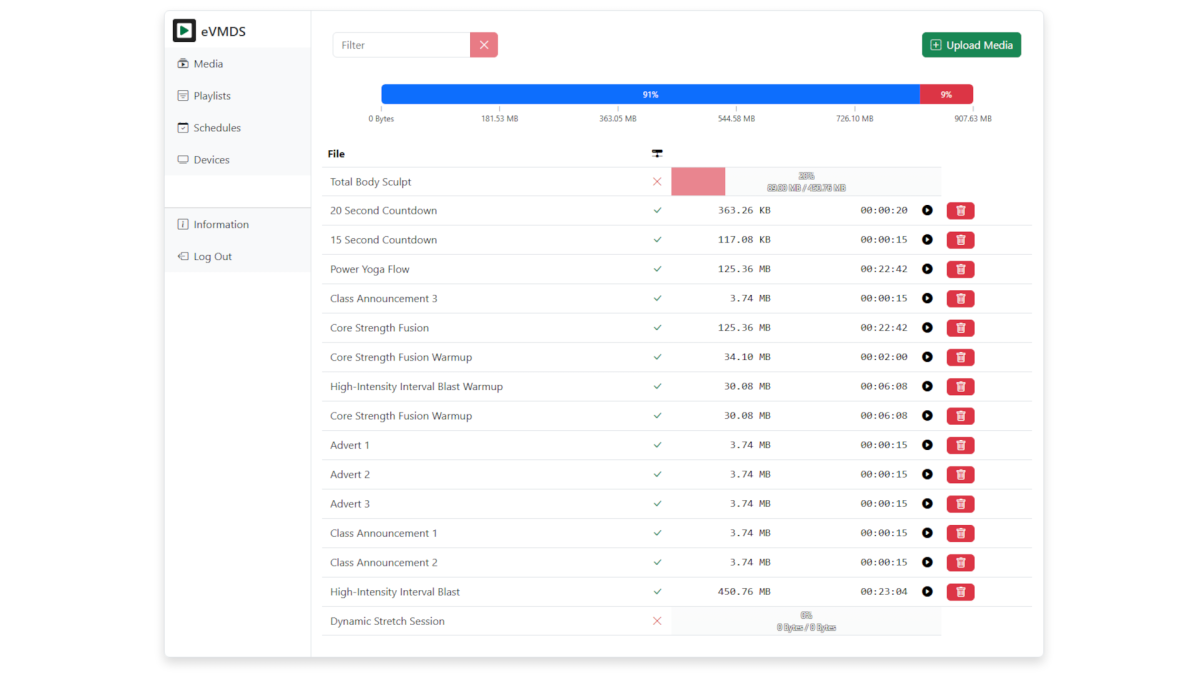
- Navigate to the Media tab. Click Upload Media.
- Select a video files from your device and click open.
- Monitor the upload progress via the Smart Uploads feature, which displays: Real-time upload progress. Confirmation when the upload is complete.
- Once uploaded, the video file will display: Status Icon: “On Disk” (indicating successful upload). File Size: Size on disk and Video Length: Duration of the video.
Note: Check the Total Disk Space Available indicator to ensure you have sufficient storage. To upgrade your storage, contact support.
3.2. Viewing Media Status
The Media page lists all uploaded video files.
Each upload displays:
- File name.
- Status Icon (“On Disk”).
- File size.
- Video length.
- Video Preview Link.
4. Playlists
4.1 Creating a Playlist
4.2 Managing Playlists
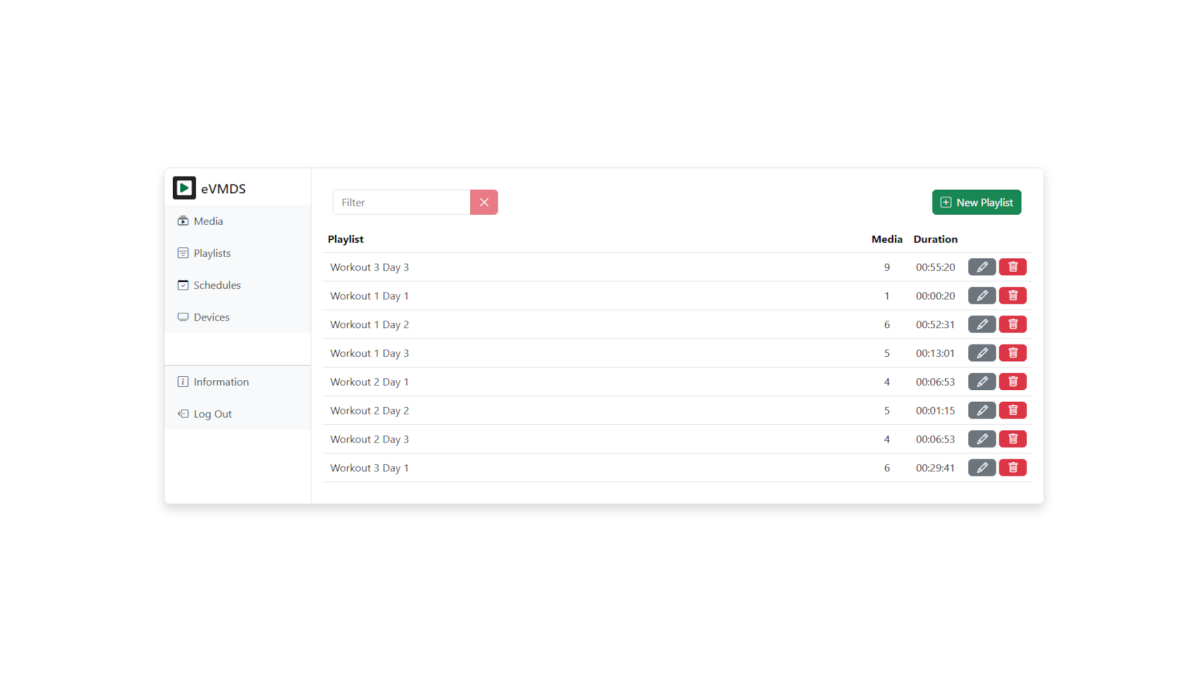
Playlists represent a calendar day and allow you to organise video files in a specific playback order.
- Navigate to the Playlists tab.
- Click "New Playlist" to create a new playlist.
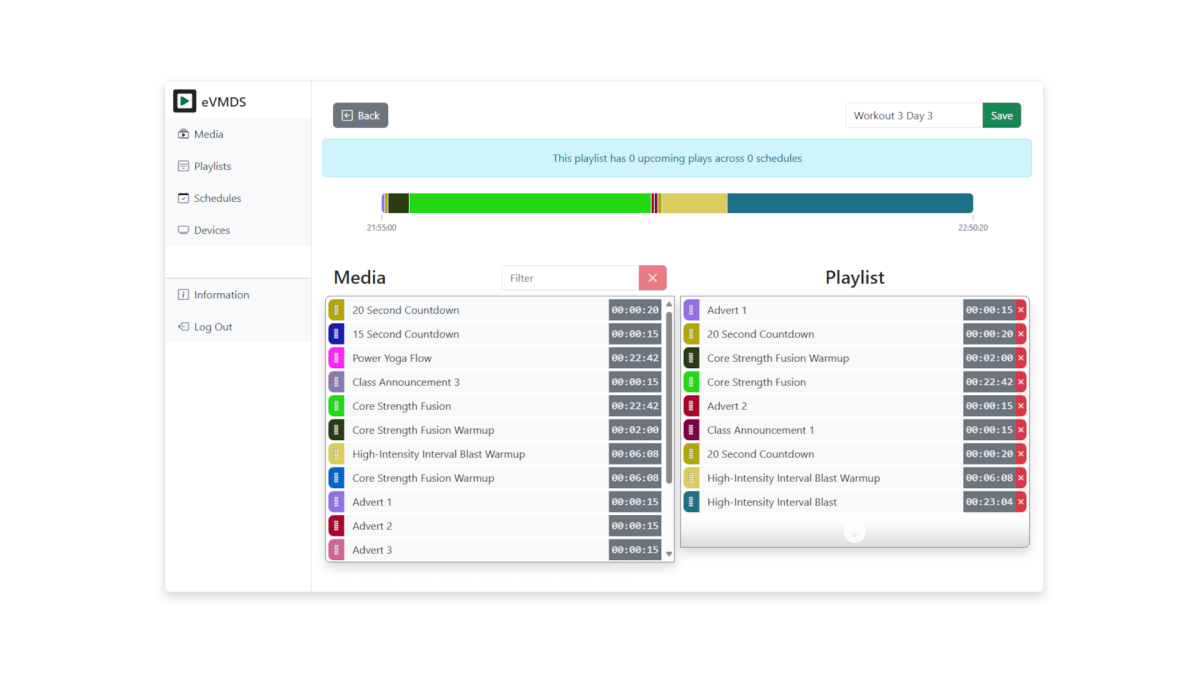
- Enter a name for the playlist (e.g., “Monday Playlist”).
- From the Media library pane, drag and drop video files into the playlist pane.
- Reorder videos as needed by dragging them within the playlist pane.
- Click Save to store the playlist
- Video name.
- File size.
- Video length.
- Total playlist length.
Note: Use the Media Pane filter to locate specific video files.
View all playlists in the Playlists page.
To edit a playlist:
- Select the playlist.
- Add, remove, or reorder videos in the playlist pane.
- Click Save to update.
Note: There is no limit to the number of playlists you can create.
5. Schedules
5.1 Creating a Schedule
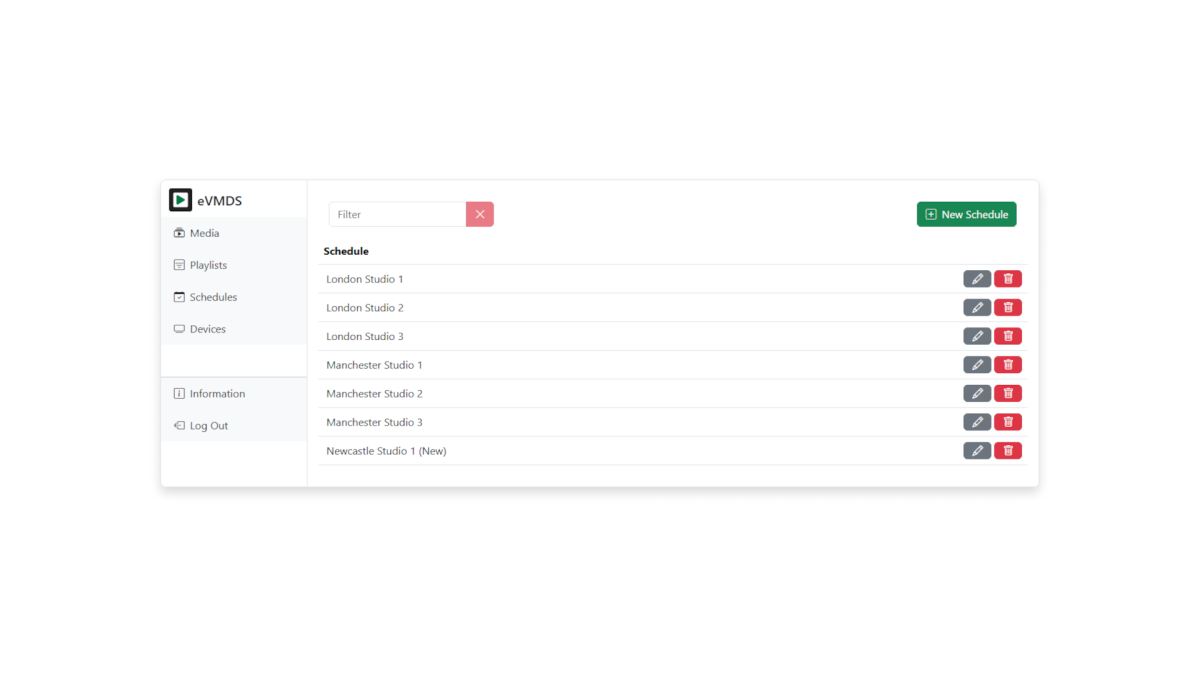
Schedules allow you to assign playlists to specific calendar days for automated playback.
- Navigate to the Schedules page.
- Click "New Schedule" to create a new Schedule.
- Enter a name for the schedule (e.g., “Weekly Schedule”).
- Save the schedule to proceed.
- In the Schedules page, select a schedule.
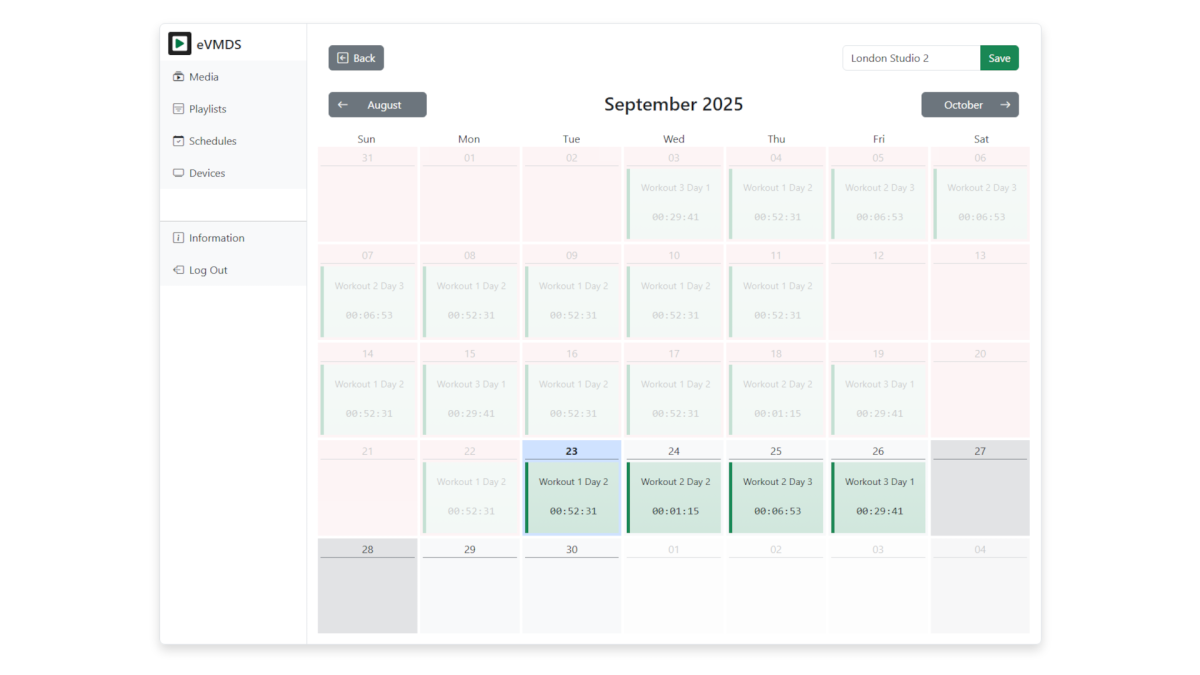
- A rolling calendar view displays all days.
- Click a future calendar day to assign a playlist.
- Choose a playlist from the playlist menu.
- Click Save to confirm the assignment.
- The calendar will update to show the assigned playlist for the selected day.
Only future days can be edited; past and present days are locked.
To modify a future day:
- Select the day in the calendar view.
- Change or remove the assigned playlist.
- Click Save.
Note: There is no limit to the number of schedules you can create.
6. Devices
6.1 Viewing Devices
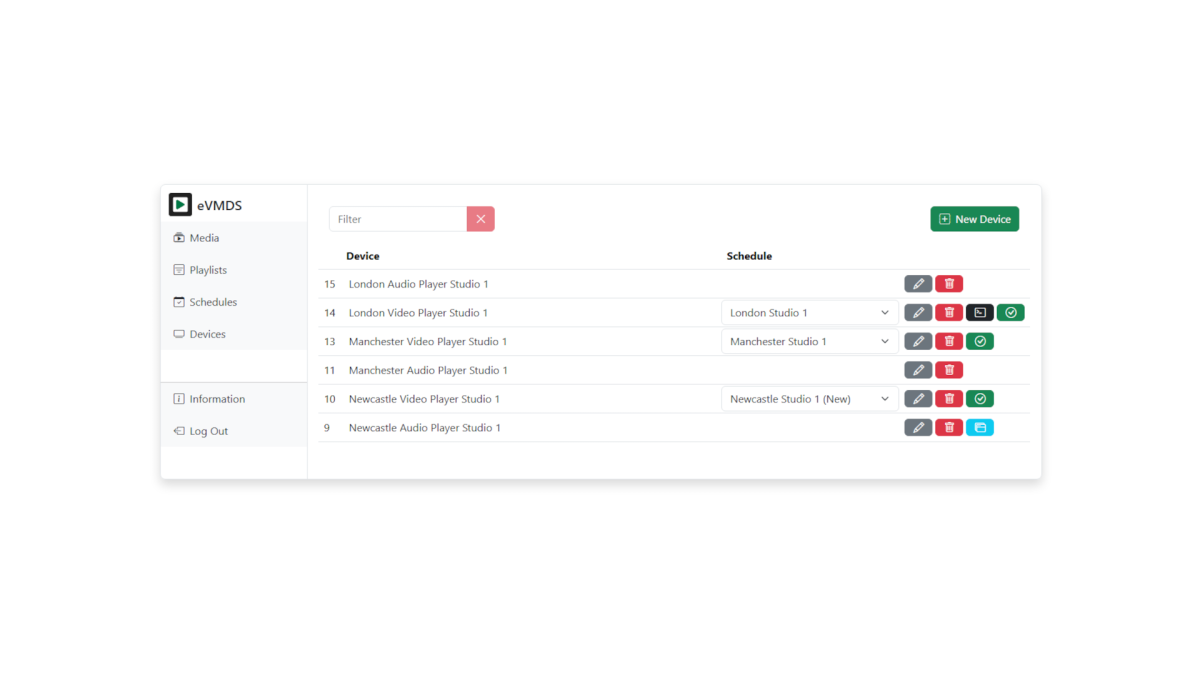
The Devices tab lists all playback devices (Players) registered in your eVMDS Server account. Players can be PCs, Mini PCs, or Laptops with the eVMDS Player software installed.
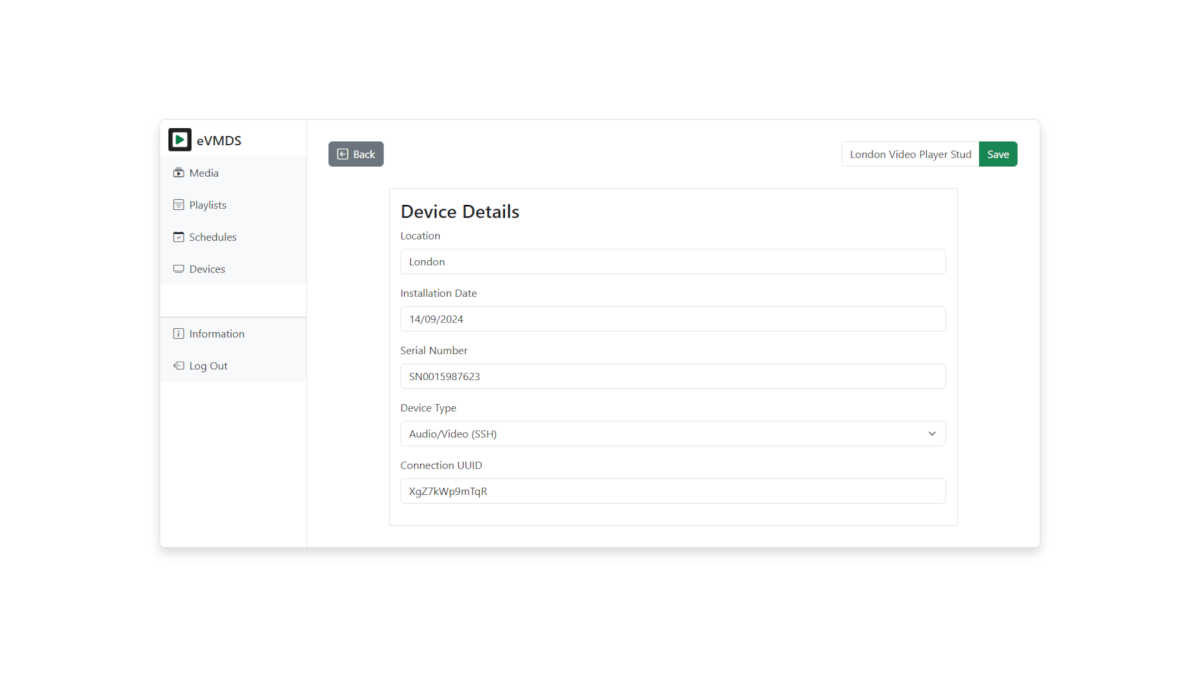
Each device entry displays:
- Device Name.
- Location.
- Installation Date (read-only).
- Serial Number (read-only).
- Device Type (read-only).
- Connection Details (read-only).
6.2 Editing Device Details
- In the Devices tab, select a device and click Edit.
- Update the following editable fields: Device Name: Customise the name for easy identification. Location: Specify the physical or logical location of the device.
- Click Save to confirm changes.
6.3 Assigning Schedules to Devices
- In the Devices tab, select a device.
- Click Assign Schedule.
- Choose a schedule from the list of created schedules.
- Click Save to link the schedule to the device.
- The device will now play the assigned schedule’s playlists on the specified days.
7. Troubleshooting
Unable to log in#
Verify your username and password. Ensure your internet connection is stable. Contact support if issues persist.
Upload fails#
Check your internet connection and file format compatibility. Ensure sufficient disk space (view in Media tab).
Contact support to upgrade storage if needed.
Playlist not saving#
Ensure all videos are uploaded and marked “On Disk.” Try refreshing the page and saving again.
Cannot edit past/present days in schedules#
Only future days are editable. Select a future date to make changes.
Device not playing schedule#
Confirm the device is online and the correct